In this tutorial, we’ll learn how to use the AutoFill feature to fill a series, sequence, pattern, or formula in Excel.
While working with repetitive work in Excel, the AutoFill feature is helpful to save your time efficiently. The AutoFill feature helps you to automatically fill cells with a series or pattern of data. In this article, we’ll learn how to AutoFill the numbers, dates, days, months, years, formula, and every Nth data.
We can also use the Fill Series, Flash Fill command to AutoFill a series, pattern, sequence, or data with the cell format in Excel.
Please download below practice Excel file to enhance your knowledge of the AutoFill feature in Excel.
What Is AutoFill in Excel?
Excel AutoFill is a feature that helps you to easily copy or fill data or create a sequence or series of values automatically in a row or column. It saves our time a lot while dealing with repetitive data and creating a series or sequence of dates, numbers, or text patterns.
Suppose you have the numbers “1”, and “2” in cells A1 and A2 respectively. Now, you want to create a series of numbers(1,2,3, etc). To do that, select cells A1 and A2 and then place your cursor at the bottom-right corner of cell A2, instantly a plus (+) symbol pops up. Hold and drag it downward and Excel will automatically create the series of numbers to the adjacent cells.

Using the AutoFill feature, you can Fill the Series, Fill Formatting Only, Fill Without Formatting, Copy Cells, or Flash Fill.
1. Use AutoFill Feature in Excel
While using the same data repeatedly, you can use the AutoFill feature to fill your data automatically in Excel. Here, we’ll learn how to AutoFill the numbers, dates, days, months, years, formula, and every Nth data.
1.1 AutoFill Numbers in Excel
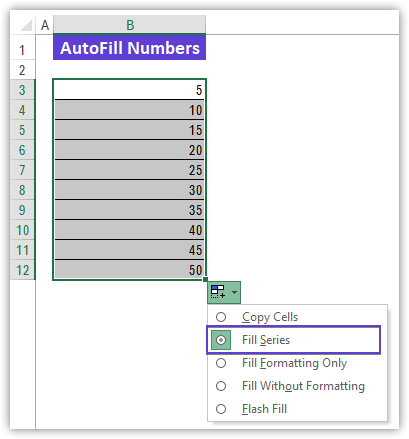
Suppose you have numbers 5 and 10 in cells B3 and B4 respectively.
- Select cells B3 and B4.
- Place your cursor at the bottom-right corner to pop up the Fill Handle icon ⇉ Press and hold the Fill Handle icon and drag it downward.

- As a result, you can AutoFill the numbers with five intervals.
- Here, we file the series only, but if you want, you can use the AutoFill Options to Copy Cells, Fill Formatting Only, Fill Without Formatting, or Flash Fill.
Note: The AutoFill feature fills numbers automatically depending on the pattern of the first two cells' values.
1.2 AutoFill Dates in Excel
Similarly, you can AutoFill dates while working with dates.
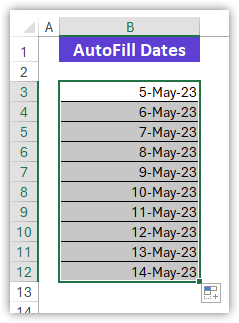
Note: You can also fill the dates along with columns in the same way.
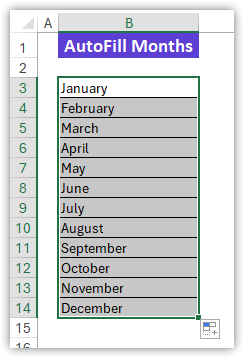
1.3 AutoFill Months in Excel
Now, you can AutoFill months by using the Fill Handle like the first example.
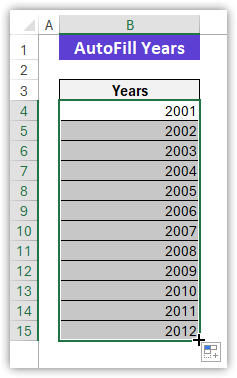
1.4 AutoFill Years in Excel
Insert the years 2001 and 2002 in cells B4 and B5 respectively. Drag the Fill Handle downward and it will automatically AutoFill the years.
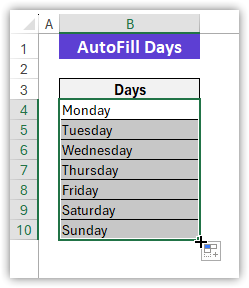
1.5 AutoFill Days in Excel
Type any day in any cell. We type Monday in cell B4 and drag the Fill Handle downward. It will automatically AutoFill the day names.
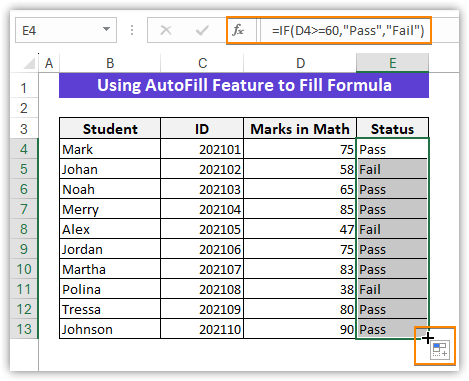
1.6 AutoFill Formula in Excel
We will use the IF function to determine the status of a student based on his or her securing marks and then AutoFill the formula to the rest of the cells in column E.
- In cell E4, type the IF formula and press the Enter key.
=IF(D4>=60,"Pass","Fail")- Hence, move your cursor to the bottom-right corner. Instantly the Fill Handle icon pops up ⇉ Press and hold the Fill Handle icon and drag it downward to AutoFill the formula up to cell E13.
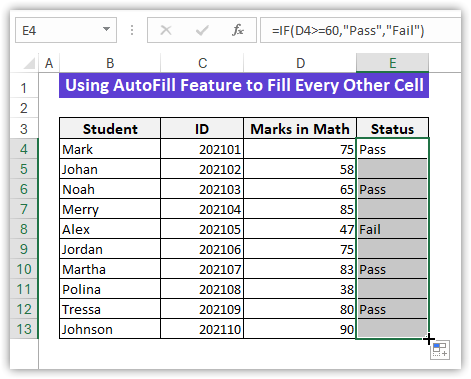
1.7 AutoFill Data with Every Other Cell in Excel
Sometimes we need to fill data in every other cell in Excel. We can easily do that by using the Fill Handle icon.
- Select cells E4 and E5 ⇉ Navigate your cursor to the bottom-right corner ⇉ The Fill Handle icon pops up.
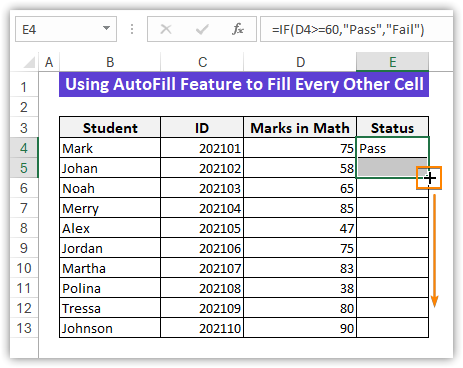
- Drag the Fill Handle icon downward to AutoFill every other cell up to cell E13
2. Use the AutoFill Feature in Excel Without Dragging
Now, we’ll AutoFill formula, series, sequence, or pattern in Excel without dragging the Fill Handle tool. If a student gets marks in mathematics greater than or equal to 60, he or she will pass otherwise, he or she will fail. We will determine the status of a student by using the IF function based on his or her securing marks in Mathematics.
- After inserting the formula in cell E4, move your cursor to the right-bottom corner of that cell.
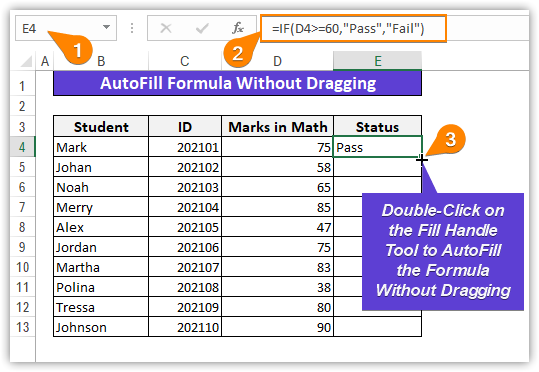
- The Fill Handle tool pops up ⇉ Double-click on the Fill Handle tool ⇉ The Fill Handle tool will automatically fill the formula to the rest of the cells of the data table.
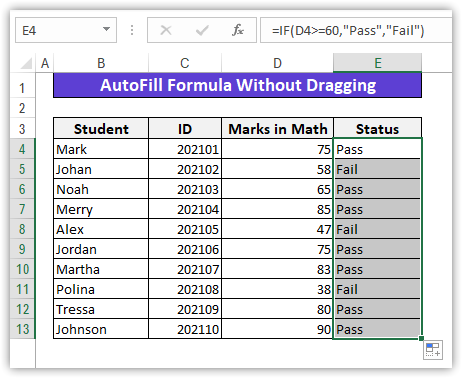
Note: The Fill Handle icon fills data if the dataset contains data in the previous column or fills data up to the cells of that dataset in the previous column.
3. Using AutoFill Feature with Keyboard Shortcut
Now, we’ll fill a formula to the entire column by using the keyboard shortcut. This is the easiest and most time-saving technique.
- In cell E4, insert the IF function like the following image to know the status of a student.
- Hence, select the data range E4:E13 ⇉ Press Ctrl+D.
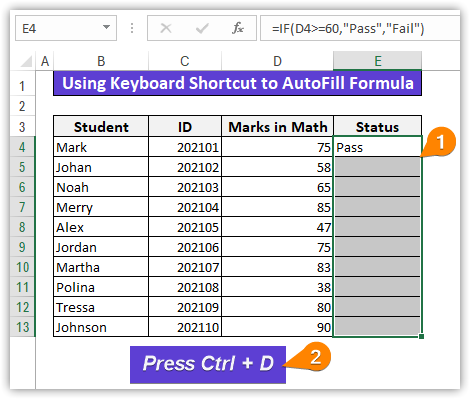
- Instantly, you can AutoFill the formula to the entire column E.
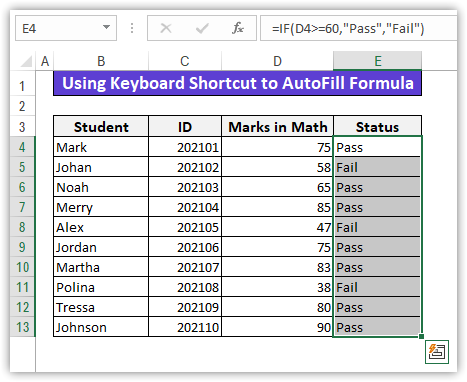
Note: If your data table is very large, and you want to select the entire column. To select the entire column, firstly select the first cell that contains the formula and then press Ctrl+Shift+Down Arrow keys After that, press Ctrl+D to AutoFill the formula. While pressing Ctrl + D keys, it will fill only the value of the first cell or formula to the rest of the selected cells.
4. Use Fill Series Feature to Fill a Series with the Cell Format in Excel
You can fill a series with the cell format by using the Fill Series feature. You can create a series in multiple rows or columns. Here, we’ll create a series in a column.
- Select any cell and type the first term of that series.
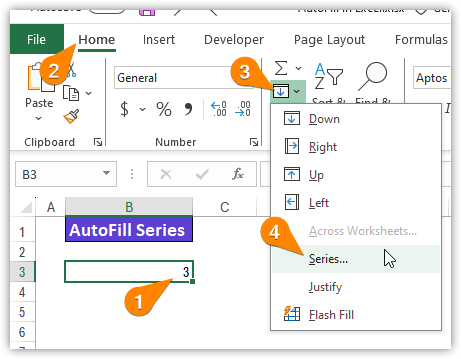
- Here, we select cell B3 and type 3 as the first term.
- After that, select Home tab ⇉ Editing ⇉ Select the Series command from the Fill drop-down list.
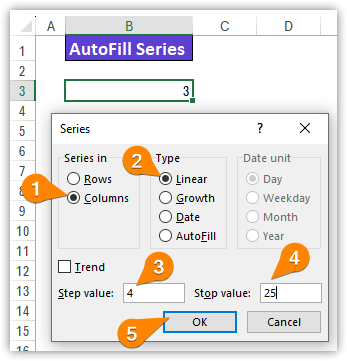
- As a result, a dialog box named Series will appear ⇉ Check the Columns option from the Series in group ⇉ Check the Linear option from the Type group.
- Hence, enter 4 in the Step value box and enter 25 in the Stop value box. ⇉ Click on the OK option.
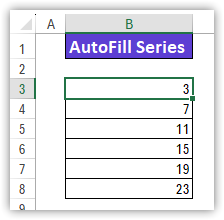
- Finally, you can AutoFill a series with a step value of 4 like the following image.
5. Use Flash Fill Feature to AutoFill a Pattern to Entire Column
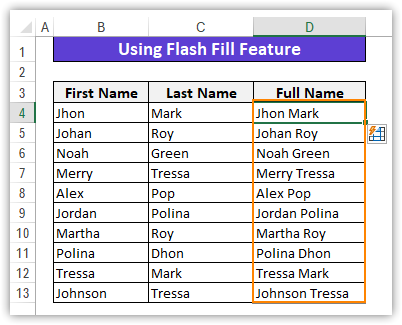
Using the Flash Fill feature, you can AutoFill a series, sequence, pattern, formula, text, or number in Excel. This feature is really helpful when your dataset is very large. We have a dataset that contains First Name and Last Name in columns B and C respectively. We’ll combine these two columns using the Flash Fill feature.
- Type the First Name and Last Name in cell D4.
- Hence, select Home tab ⇉ Editing ⇉ Select the Flash Fill feature from the Fill drop-down list.
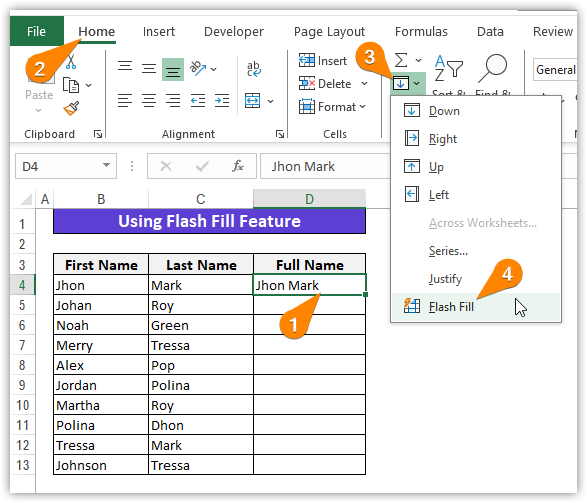
- As a result, you can AutoFill the combined First Name and Last Name in column D with the column heading titled Full Name.
Note: You can also use the keyboard shortcut Ctrl + E to AutoFil the pattern.
6. Use Go To Special Command and Keyboard Shortcut to AutoFill Blank Cells in Excel
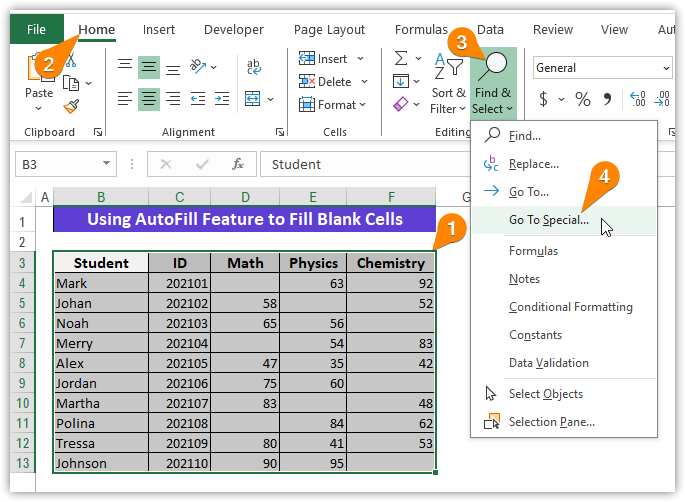
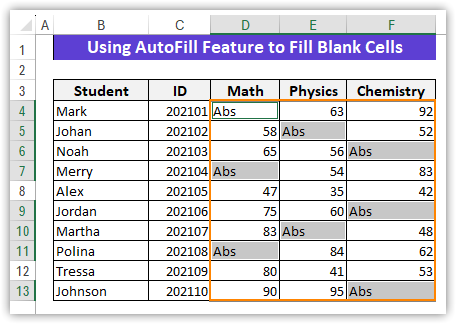
We have a dataset that contains the securing marks of several students. But we notice that some of them can not appear in the examination. We’ll fill those blank cells with Absent (short form Abs). To do that, we will use the Go To Special command and keyboard shortcut.
- Select the entire dataset ⇉ Go to the Home tab ⇉ Editing ⇉ Select the Go To Special command from the Find & Select drop-down list.
- Instantly, the Go To Special dialog box appears ⇉ Select Blanks ⇉ OK.
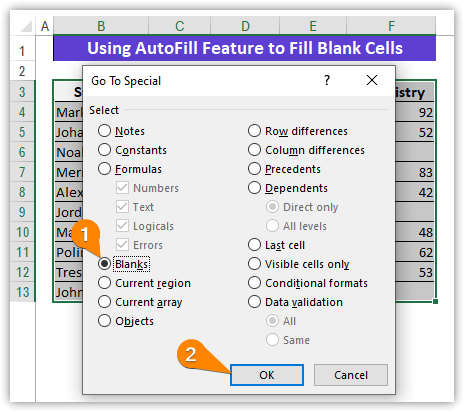
- Hence, the blank cells will be selected.
- After that, type Abs and press Ctrl + Enter.
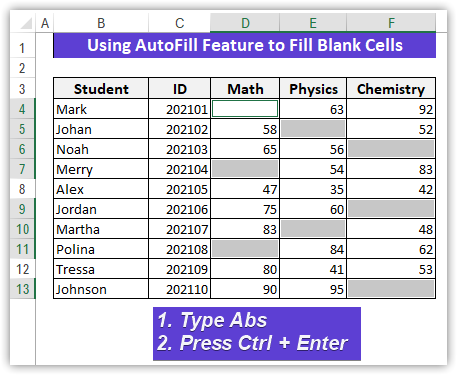
- Finally, the blank cells will AutoFill with the text Abs.
7. Apply SEQUENCE Function to AutoFill Data in Rows and Columns
We can create a series or sequence by using the SEQUENCE function in Excel.
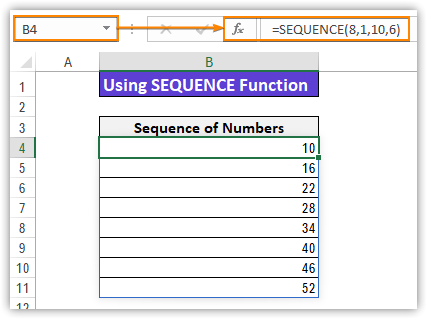
- Select cell B4, and type the following formula. Press Enter.
=SEQUENCE(8,1,10,6)Here, 8 is the rows, 1 is the columns, 10 is the start(first term of the series), and 6 is the step value of the SEQUENCE function.
8. Use AutoFill with VBA in Excel
Suppose, we want to create or AutoFill a series in Excel. Using VBA code, we can do that easily.
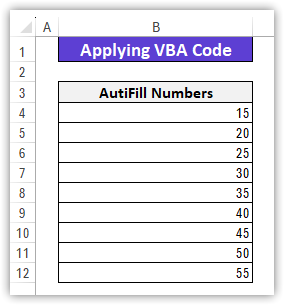
- Insert 15 and 20 in cells B4 and B5 respectively.
- To pop up the VBA editor, select the Developer tab ⇉ Code ⇉ Visual Basic. You can also do that by pressing the Alt +F11 keys.
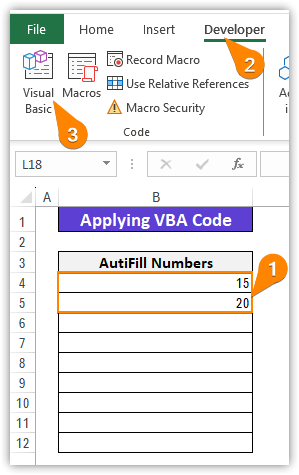
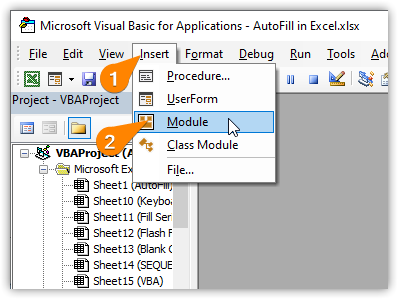
- Insert ⇉ Module
- Type the following VBA code and save the file with the .xlsm extension. After that, Run the VBA code.
Sub AutoFill_Series()

Range("B4:B5").AutoFill Destination:=Range("B4:B12"), Type:=xlFillDefault

End Sub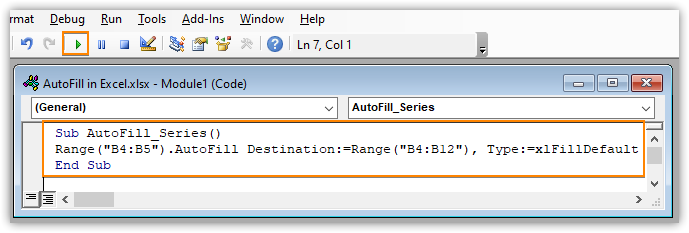
- After executing the VBA code, you can create or AutoFill a series like the below image.
How to Enable or Disable Fill Handle in Excel
You can enable or disable the Fill Handle tool from the Advanced Settings option if it is not enabled in your Excel version.
- Open an Excel workbook ⇉ Press Alt + F + 00(press double zero) one after one.⇉ Select Options.
- Excel Options dialog box pops up ⇉ Select the Advanced option ⇉ Check the Enable fill handle and cell drag-and-drop option ⇉ OK.
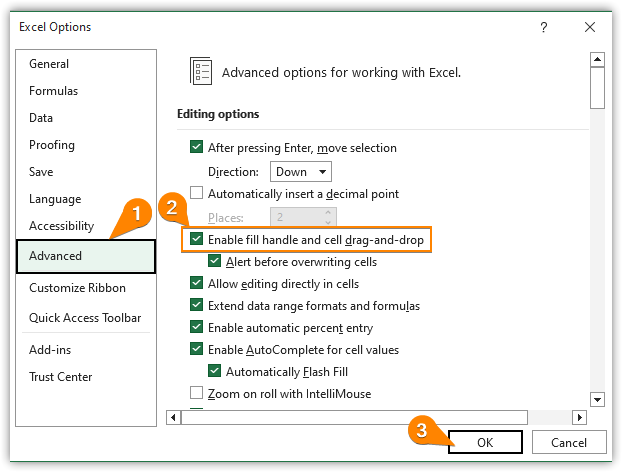
Note: If you want to disable the Fill Handle, simply uncheck the Enable fill handle and cell drag-and-drop option.
Conclusion
We have learned from the above discussion how to AutoFill the numbers, dates, days, months, years, formula, and every Nth data with cell format. You can also fill alternative cells using the AutoFill feature in Excel. If you have any queries or suggestions about this article, leave it in the comment section.
Tags: Range