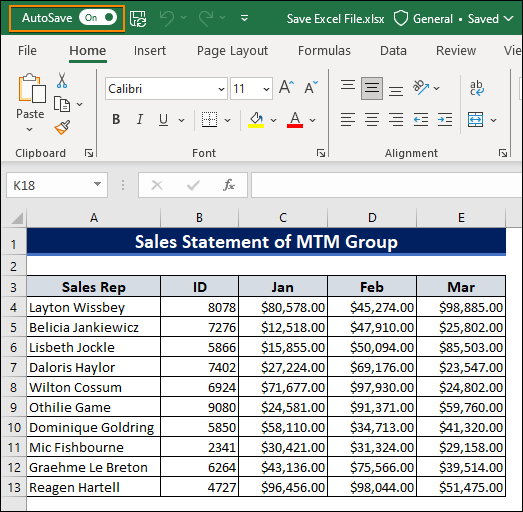
In this tutorial, I will show you how to save an Excel file. When we create and modify a lot in an Excel file, it's important to save it for future use. We saved our Excel file to ensure that we didn't lose our modified data in the workbook.
To save our Excel file, we’ll use the Save As command, keyboard shortcut, Quick Access Toolbar, and Export command. You can also protect the Excel file by using a password.

1. Use Save As Command to Save Excel File
You can use the Save As command while saving your Excel file on your computer or web.
- Choose File tab ⇉ Save As ⇉ Browse.
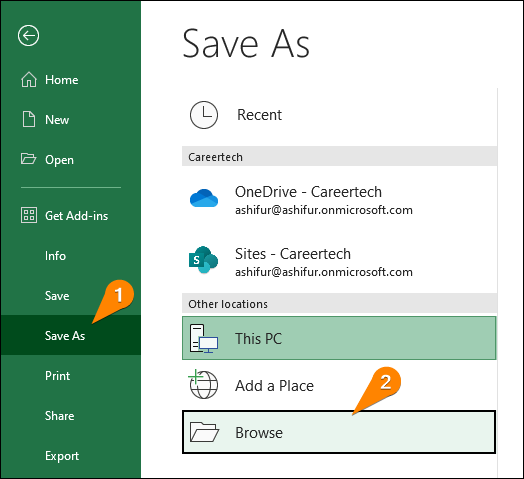
- Save As dialog box will appear ⇉ Insert any name in the File name typing box and choose Excel Workbook with .xlsx extension from the Save as type drop-down list.
- Press the Save option.
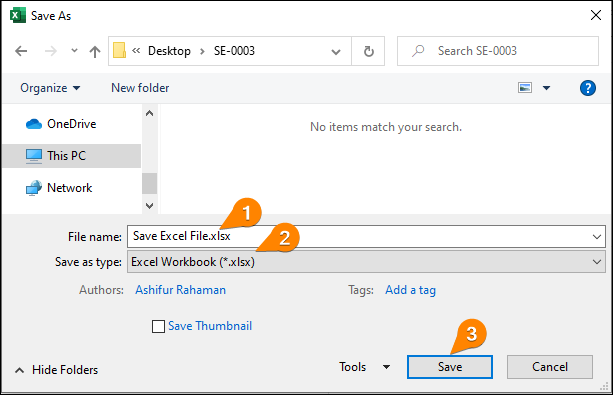
- Finally, you save your Excel file to your desired location.
Notes: If you want to save your existing Excel file to the current location, simply press Ctrl + S.
2. Use Keyboard Shortcut to Save Excel Workbook
You can use the keyboard shortcut Ctrl + S to save your Excel file.
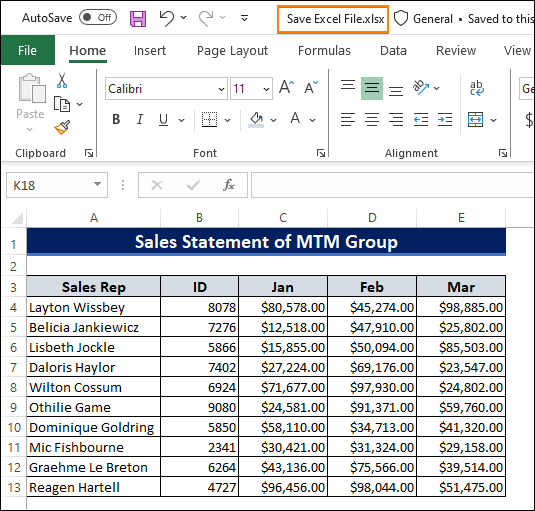
- Open your Microsoft 365 and create the following data.
- Press Ctrl + S
- Hence, follow the previous method to save your Excel workbook.
3. Using Quick Access Toolbar to Save Excel File
The other easiest way to save an Excel file is to use the Quick Access Toolbar feature. When you make a lot of changes to your Excel file, you need to save the file. In that case, you can use the Quick Access Toolbar feature to save the Excel file.
- Select the Save option from the Quick Acces Toolbar feature like the following screenshot.
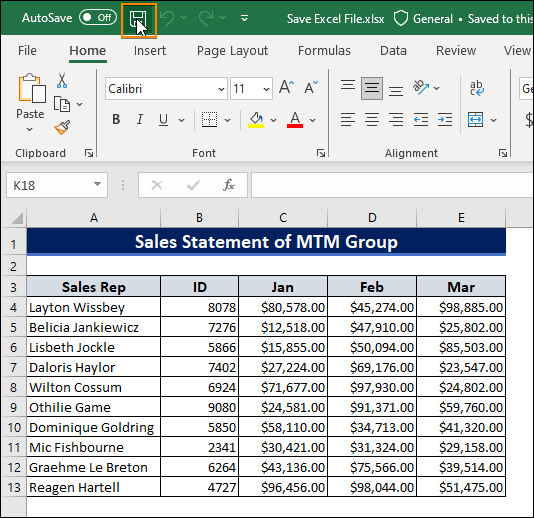
Note: If the Save icon is not visible to the Quick Access Toolbar(QAT) in Excel, then you can make it visible. To do that, click the down-arrow icon at the right end of the QAT and check the Save option.
4. Use Export Command to Save Excel Workbook as PDF
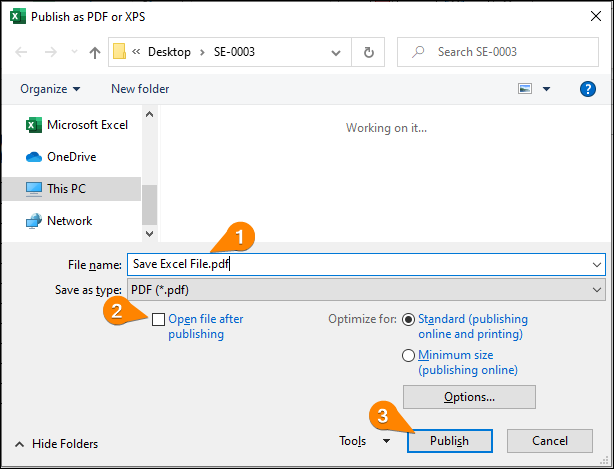
Now, we’ll save our Excel workbook as PDF (Portable Document Format) by using the Export command.
- Press Alt + F + E + P + A keys one after another.
- Published as PDF or XPS dialog box appears ⇉ Insert the file name with .pdf extension.
- Uncheck the Open file after publishing option ⇉ Published.
- Hence, you can save your Excel file as .pdf extension to your desired location.
Save Excel File in Different Formats
There are several types of file extensions in Excel. Here are the common extensions:
| File Type | Extension | Explanations |
|---|---|---|
| Excel Workbook | .xlsx | Used in Excel 2010 and later versions. |
| Excel 97-2003 Workbook | .xls | Used in Excel 2003 and older version. |
| Excel Macro-Enabled Workbook | .xlsm | Excel file that contains VBA macros. |
| Excel Template | .xltx | Template files in Excel. |
| Web Page | .html | A web page that contains images and text, saved as a folder with an .html extension. |
| CSV | .csv | Import/export data with Comma delimited text file |
| Formatting document and sharing file with Portable Document Format. | ||
| Text(MS-DOS) | .txt | Importing or Sharing data with plain text files. |
How to Turn on AutoRecovery in Excel
If you make a lot of changes and lose your data due to electricity going out, you can easily recover it by turning on AutoRecovery option.
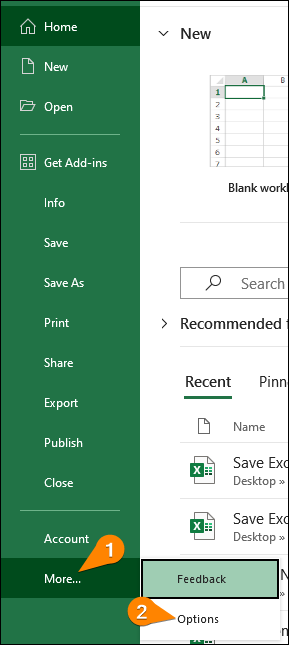
- File tab ⇉ More ⇉ Options.
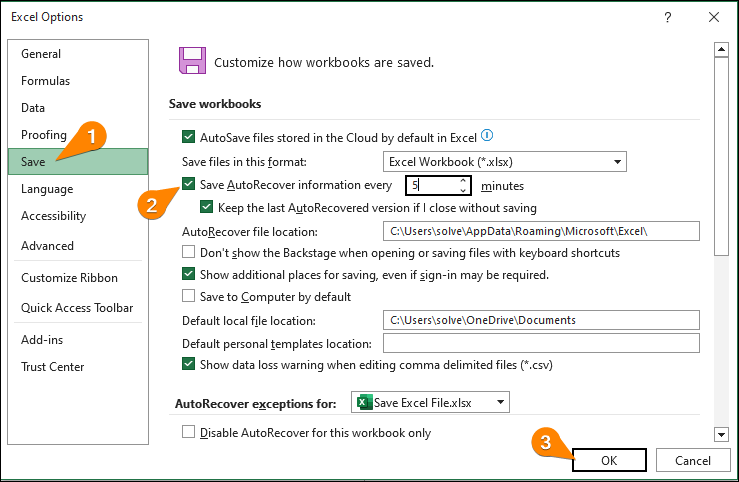
- Excel Options dialog box will appear ⇉ Save ⇉ Check and insert 5 in the Save AutoRecover information option ⇉ OK.
- Hence, you can back up your data every 5 minutes.
Notes: You can turn on the AutoSave option from the Quick Acces Toolbar to save the Excel file to Onedrive.
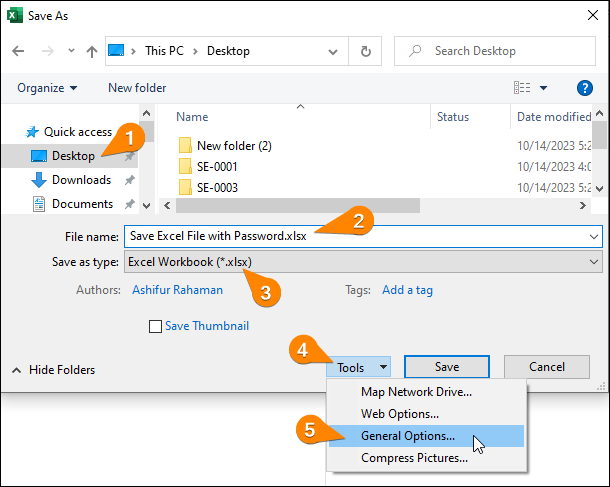
How to Save Excel File on Desktop with Password
You can save your Excel workbook on Desktop with a password using the General Options tool from the Save As command.
- Press Alt + F + A + O keys one after another.
- Save As dialog box appears ⇉ Give any name of the file as you want ⇉ Select General Options from the Tool drop-down list.
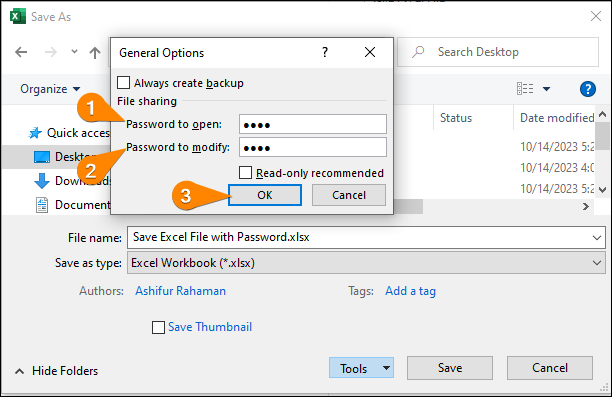
- General Options dialog box pops up. Insert the passwords as you want to Open or Modify the Excel workbook ⇉ OK.
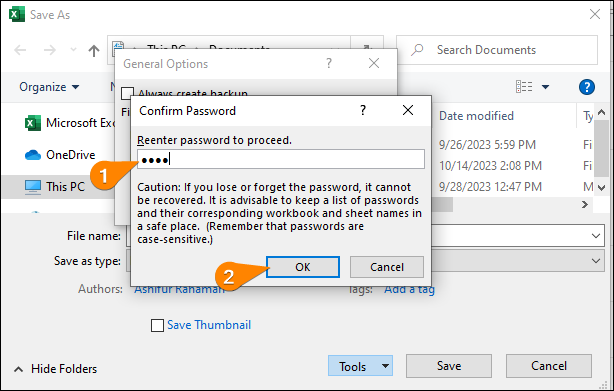
- Confirmed Password dialog box appears ⇉ Enter password again ⇉ OK.
- Now, save the file and reopen it to modify.
- You will notice that the file requires a password to open for modification.

Conclusion
We saved our Excel file so that we could not lose our modified data in an Excel workbook. We have learned from the above discussion how to save an Excel file. I have also discussed how to restrict your Excel file by setting a password. I think this article is helpful for you. Leave a comment in the comment section below, if you have any queries or suggestions.
Tags: Workbook